Tomatoes are among the most popular crops grown by gardeners across the world. Their rich, juicy taste and versatility in dishes make them a staple in home gardens. However, any tomato grower, novice or seasoned, knows that this beloved plant is highly susceptible to blight. Tomato blight can be devastating, wiping out entire crops if left unchecked.
While there are many strategies to prevent and manage tomato blight, mulching stands out as one of the most effective and natural defenses.
In this blog post, we’ll explore what tomato blight is, how it spreads, and why mulch might just be your best weapon in the fight against it.
What is Tomato Blight?
Tomato blight refers to several fungal or fungal-like diseases that affect tomato plants. The two most common types are:
1. Early Blight (Alternaria solani):
Appears as dark spots with concentric rings on older leaves. These spots expand and eventually cause the leaf to yellow and die, starting from the bottom of the plant upwards.
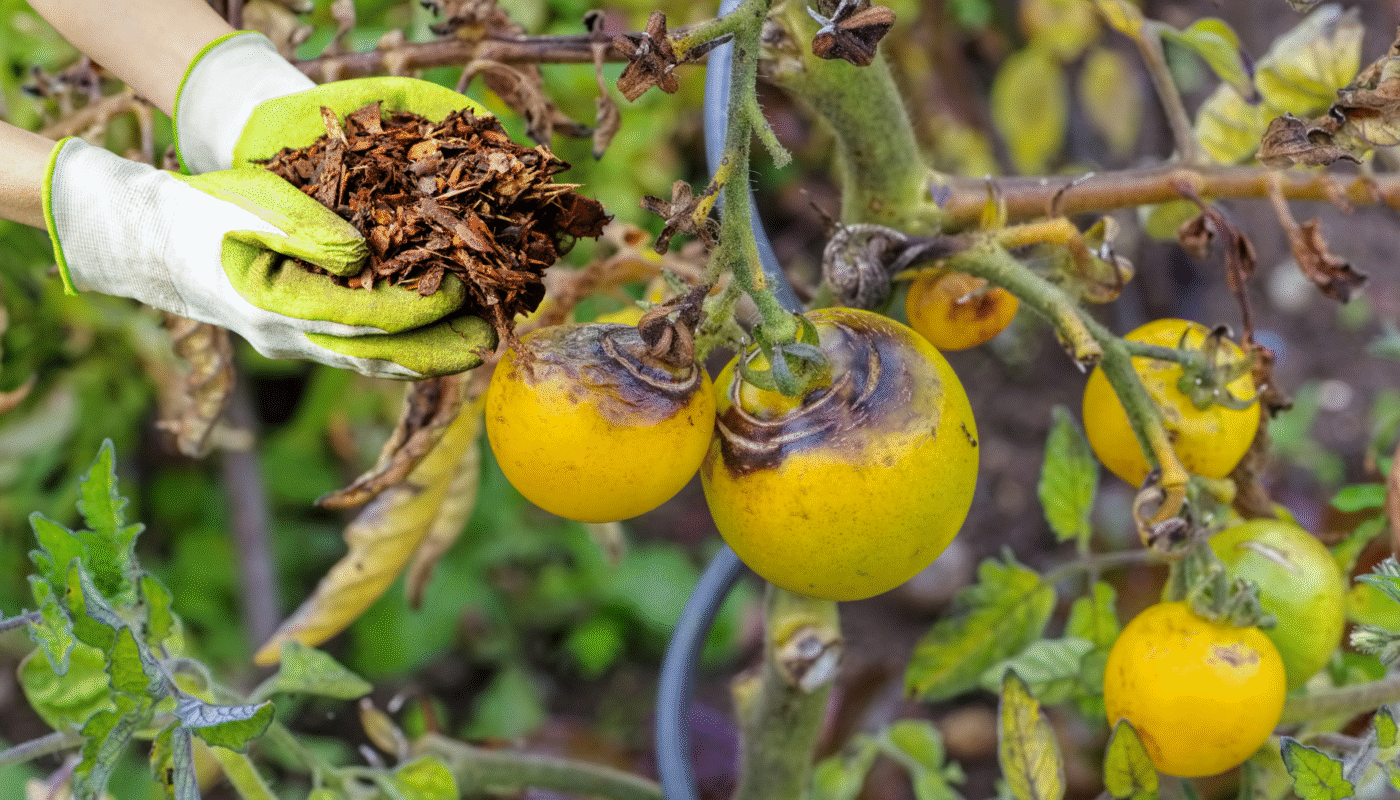
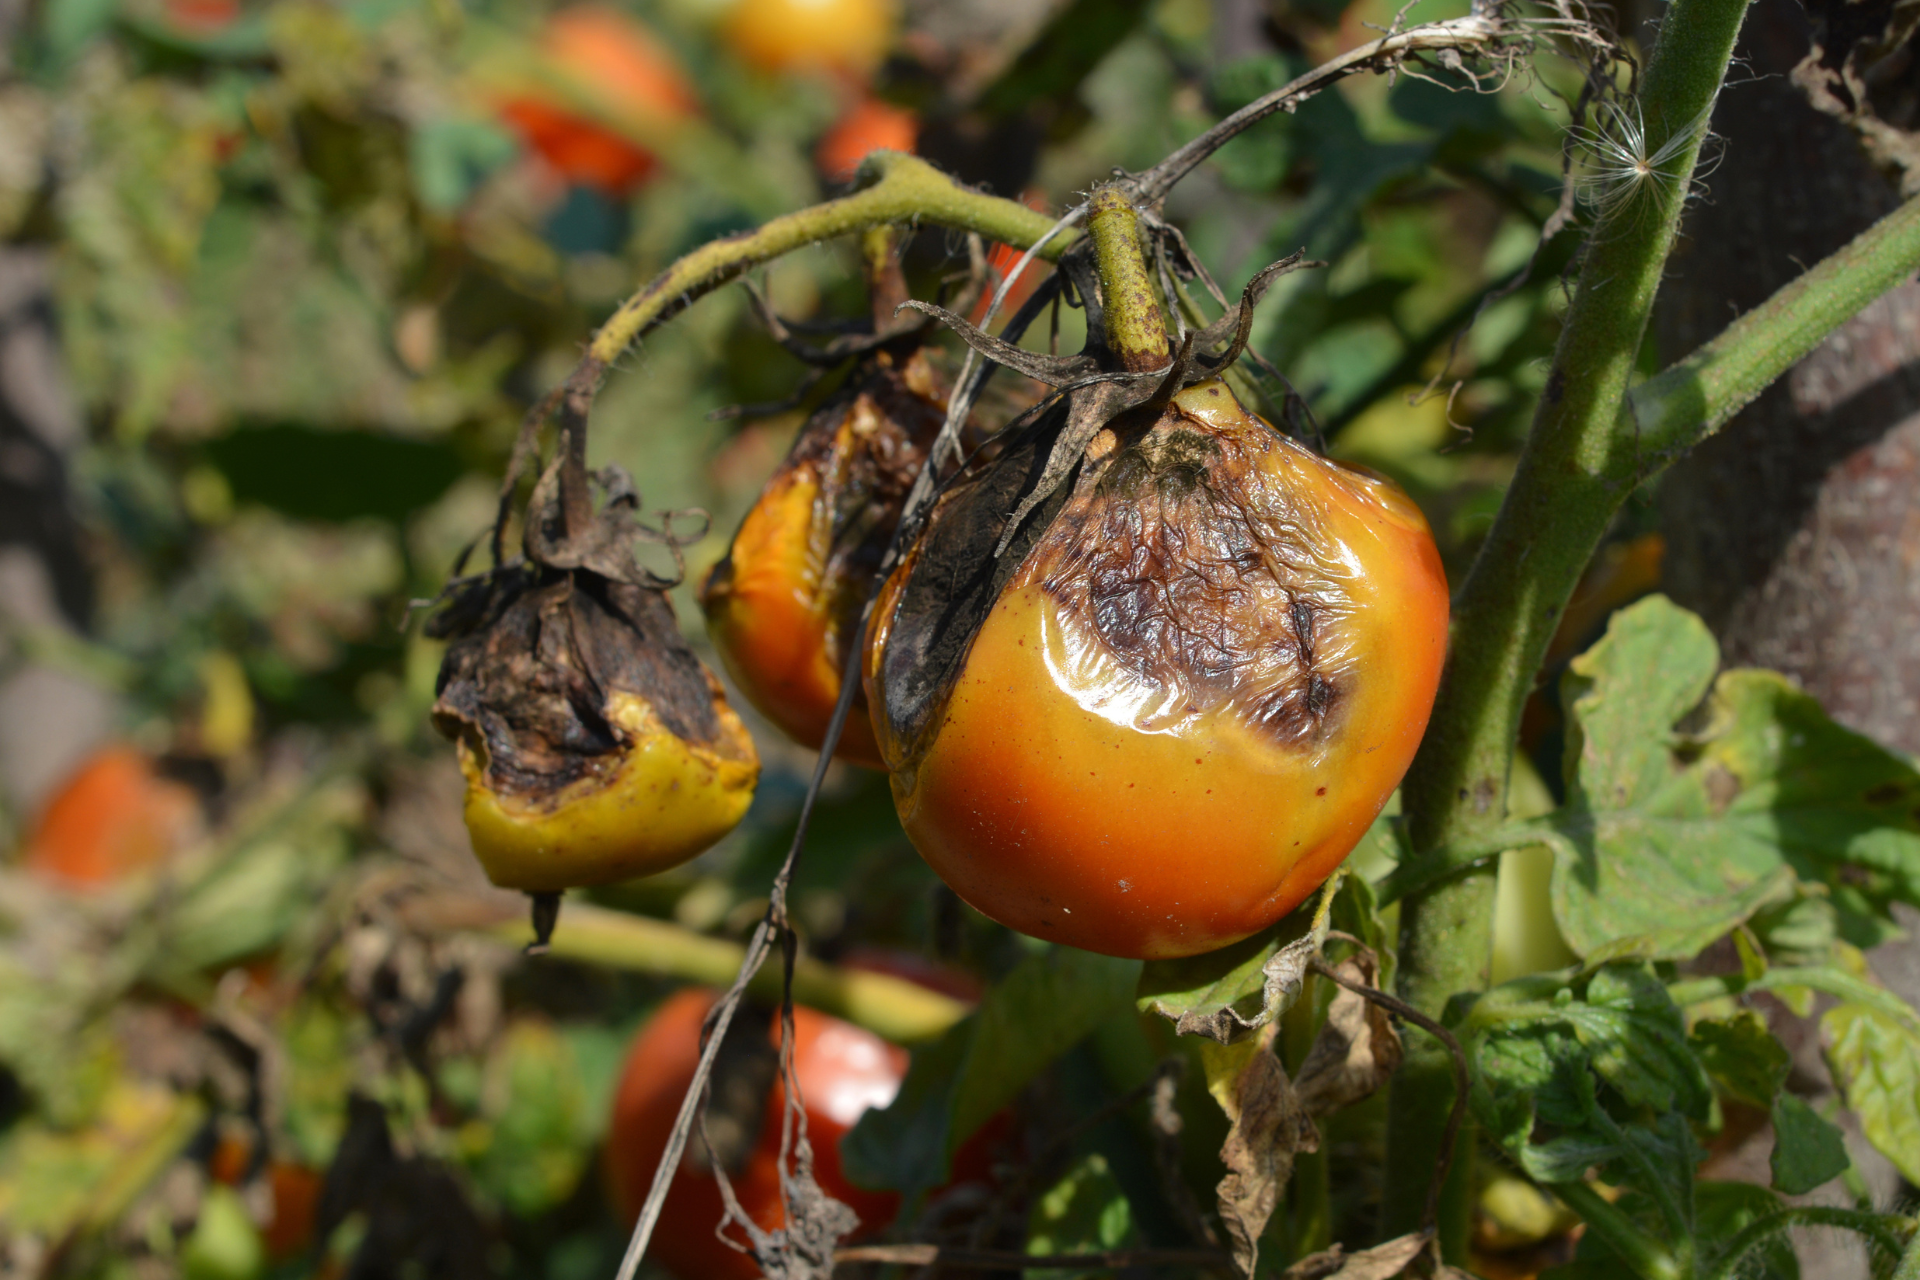
2. Late Blight (Phytophthora infestans):
More aggressive and dangerous, late blight can rapidly destroy entire tomato crops. It presents as water-soaked lesions on leaves and stems that quickly darken and rot.
Both types of blight thrive in warm, humid conditions and spread quickly via spores carried by wind, water, insects, and contaminated tools or soil.
Also Read: How to Treat and Prevent Late Blight of Tomatoes

The Root of the Problem
Blight pathogens can survive in the soil or on plant debris, waiting for the right conditions to infect tomato plants. Rain or watering can cause soil to splash onto lower tomato leaves, carrying fungal spores directly to the plant’s foliage. From there, infection sets in, spreading upward and weakening the entire plant.
This soil splash is a critical and often overlooked mode of transmission. But it’s precisely this that mulch helps prevent, and why mulch is a powerful ally against tomato blight.
What is Mulch?
Mulch is any material placed on the soil surface around plants to provide protective benefits. Mulch can be organic, such as straw, shredded leaves, grass clippings, or compost; or inorganic, such as plastic sheeting or landscape fabric.
When applied properly, mulch performs several key functions in a garden, including:
- Regulating soil temperature
- Retaining soil moisture
- Suppressing weed growth
- Improving soil structure (with organic mulches)
- And most importantly, blocking the soil-to-leaf pathway for fungal diseases like blight
How Mulch Defends Against Tomato Blight
1. Prevents Soil Splash Contamination
As mentioned earlier, rain or irrigation can cause spores in the soil to splash up onto the lower leaves of tomato plants. This is often the first step in the blight infection process. By creating a physical barrier between the soil and the plant, mulch prevents this splash-up from occurring.
Organic mulch materials such as straw or shredded leaves are particularly effective in absorbing the impact of water droplets and keeping soil particles and fungal spores safely out of reach.
2. Maintains Consistent Moisture Levels
Blight loves moist, humid environments. When soil dries out and is then rehydrated (a common cycle in summer gardens), this fluctuation can encourage fungal growth. Mulch regulates soil moisture, reducing stress on the plant and minimizing the conditions that blight pathogens thrive in.

By keeping the soil evenly moist, not too wet and not too dry, mulch helps maintain a healthier growing environment that’s less conducive to fungal outbreaks.
3. Reduces Fungal Spore Dispersal
Mulch not only keeps spores in the soil from splashing up, but it also traps and suppresses spores that might already be present on the ground. Without wind or water to carry them into the air, these spores are far less likely to find their way to tomato foliage.
This is especially important for gardeners who have dealt with blight in previous years. Since the pathogens can overwinter in soil or debris, mulch acts as a shield that reduces the chance of reinfection.
4. Prevents Weeds That May Harbor Disease
Weeds compete with tomato plants for nutrients and water, but they can also harbor pests and diseases, including blight pathogens. Mulch suppresses weed growth by blocking sunlight and making it difficult for weed seeds to germinate.
With fewer weeds around, there are fewer opportunities for blight to take hold in nearby plants and jump to your tomatoes.
5. Improves Soil Health Over Time (Organic Mulch)
Healthy plants are more resistant to disease. Over time, organic mulch breaks down and feeds the soil, improving its structure and fertility. This leads to stronger root systems and more resilient tomato plants.
A vigorous, well-fed tomato plant is better equipped to resist blight and recover from minor infections.
Best Mulches to Use Against Tomato Blight
Not all mulches are created equal. When fighting tomato blight, you want mulch that is:

- Organic or biodegradable
- Free from pathogens
- Effective at suppressing splash and weed growth
Here are some top mulch options:
1. Straw (Not Hay)
Straw is an excellent mulch for tomatoes. It’s light, easy to apply, and does a great job of preventing soil splash. Make sure to use clean straw that’s free of weed seeds and mold.
2. Shredded Leaves
Readily available in fall, shredded leaves are a cost-effective and eco-friendly mulch. Shred them before applying to prevent matting and to help them break down evenly.
3. Compost
A thin layer of mature compost can help enrich the soil and block pathogens. However, it may not be as effective alone for splash prevention, so it’s often used in combination with another mulch.
4. Grass Clippings (Dried)
Use only dry, untreated grass clippings in a thin layer. Fresh clippings can mat and create overly moist conditions that actually encourage fungal growth.
5. Pine Needles
While slightly acidic, pine needles make a good mulch for tomatoes and other vegetables when used in moderation. They allow air and water through and are slow to decompose.

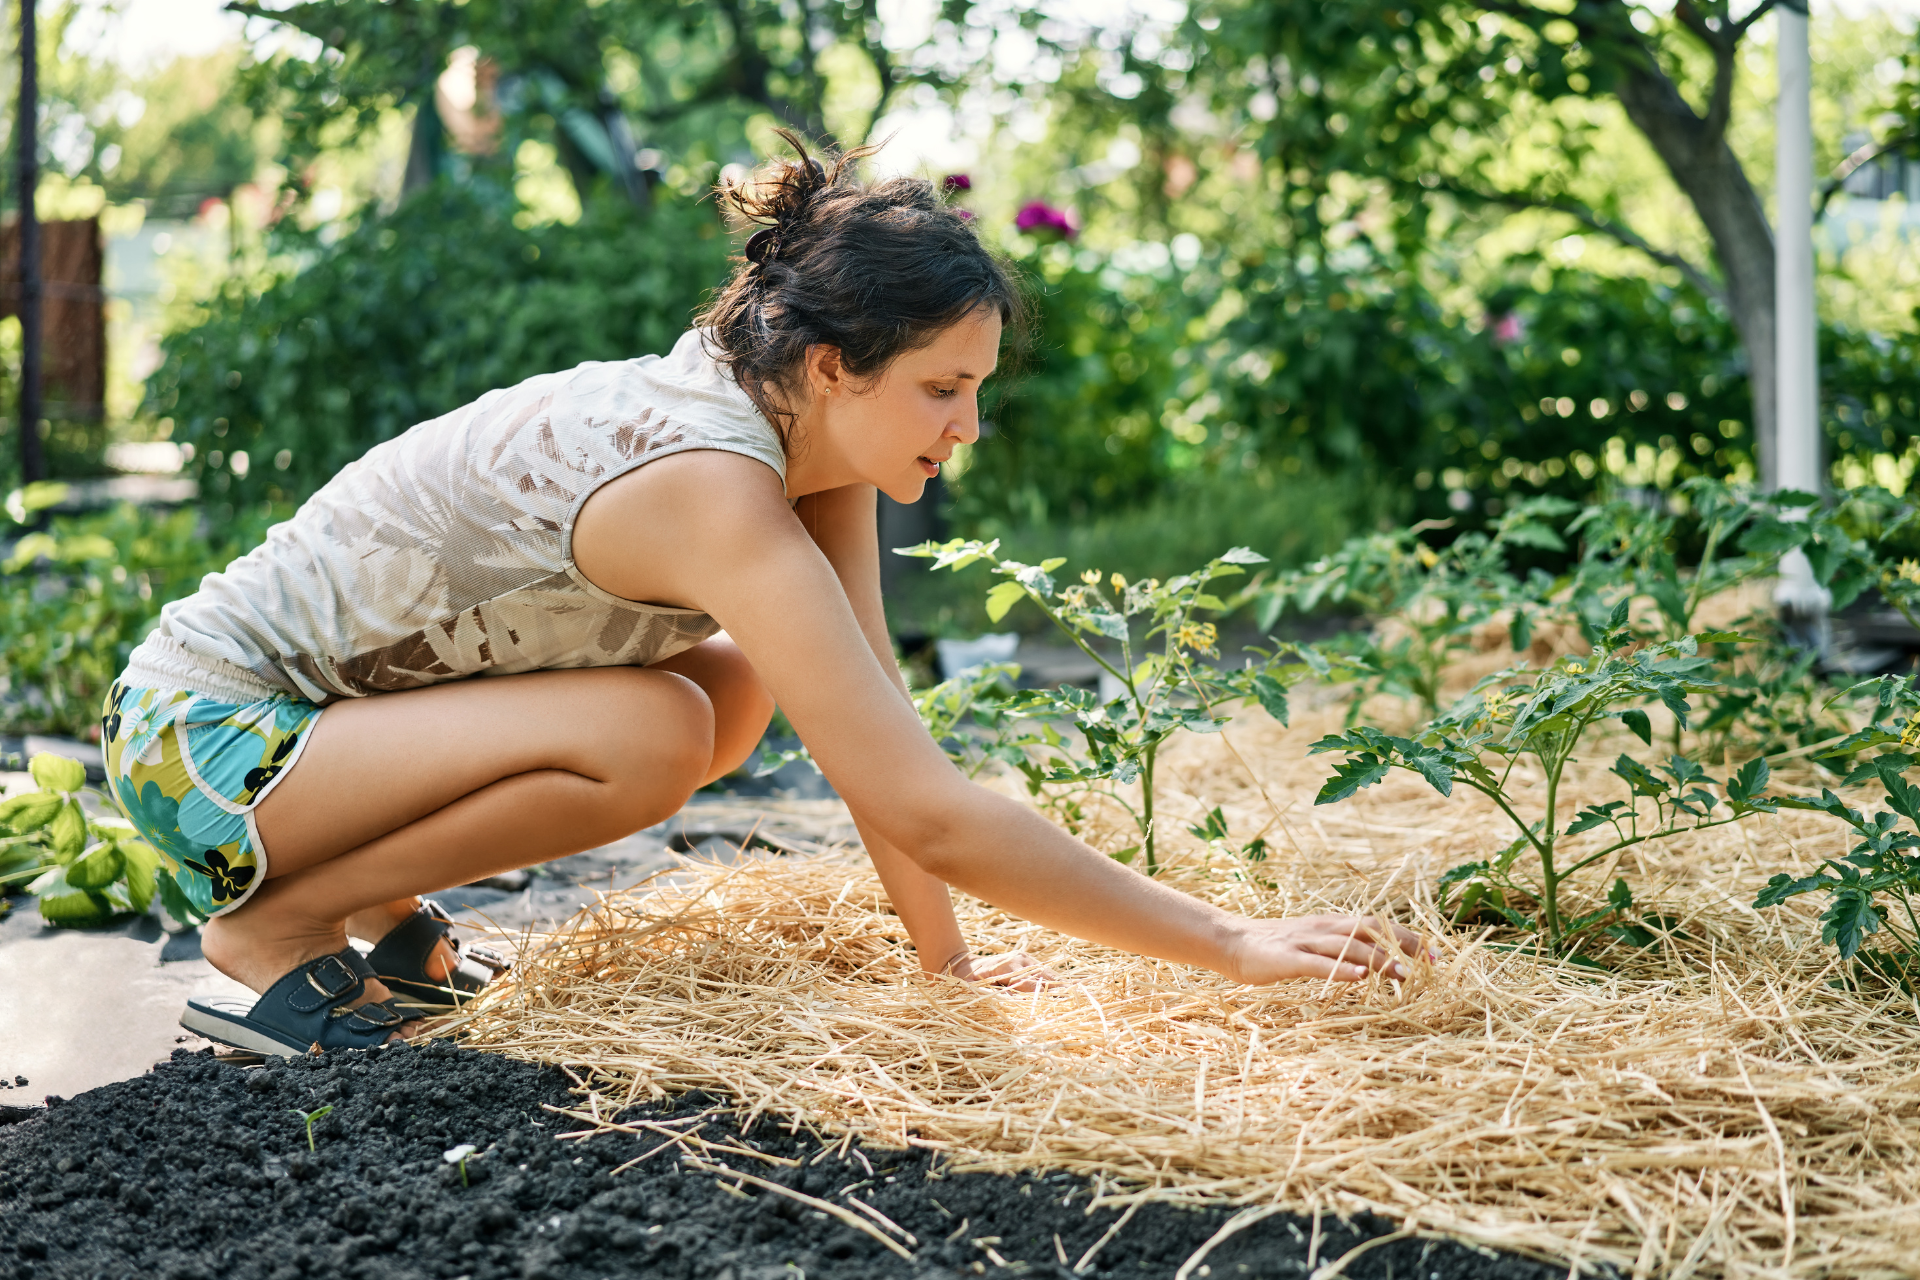
How to Properly Apply Mulch for Maximum Blight Protection
To get the full protective benefits of mulch, follow these simple steps:
Step 1: Wait Until Soil Warms
Don’t apply mulch too early in spring, especially in cool climates. Wait until the soil has warmed (around 60°F or 15°C) to avoid stunting growth.

Step 2: Clear the Area Around the Plant
Remove any weeds or debris around the base of the tomato plant. Make sure the area is clean before mulching.
Step 3: Apply 2–3 Inches of Mulch
Spread mulch in a 2–3-inch-thick layer around the plant. Avoid piling mulch directly against the stem, as this can cause rot or pest problems. Leave a 1–2 inch gap around the main stem.
Step 4: Replenish as Needed
Mulch breaks down over time, especially organic types. Check your mulch layer every few weeks and replenish as necessary to maintain consistent coverage.
Other Tips for Preventing Tomato Blight
While mulch is a powerful ally, it works best as part of an integrated disease management strategy. Combine it with the following practices for the best results:
- Rotate crops yearly to avoid pathogen buildup in the soil
- Use disease-resistant tomato varieties
- Prune lower leaves that touch or come close to the ground
- Water at the base of the plant using drip irrigation or a soaker hose
- Avoid overhead watering
- Remove infected plant material immediately and dispose of it properly
- Sanitize tools between uses
Final Thoughts
In the battle against tomato blight, prevention is everything. While many gardeners turn to fungicides or other chemical treatments, mulch offers a natural, affordable, and highly effective way to protect your plants.
If you’re serious about growing healthy, productive tomato plants this season, don’t skip the mulch. It may be the best line of defense your garden has against the silent creep of tomato blight.
Have you used mulch in your tomato garden before? Share your experience or tips in the comments below!